About the extension
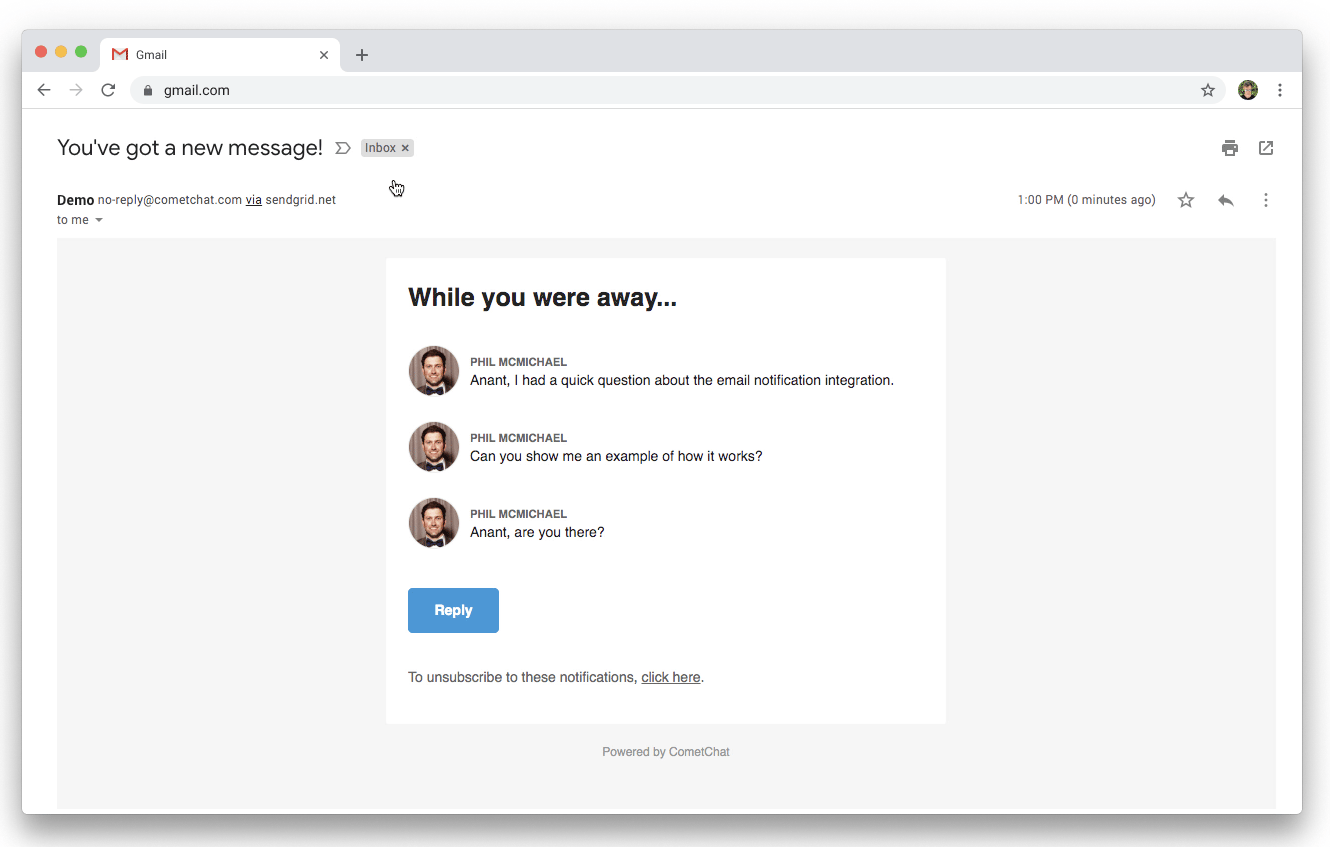
The Email Notification extension helps you to notify offline users about unread messages via emails. After you’ve configured the extension, your users will receive email notifications for unread messages in one-on-one conversations. The Email notifications extension allows you to have the following two integrations:Before you begin
These steps are required irrespective of the integration.1. Storing user emails
You can use our Update user API to set private metadata for a user. We recommend adding this code where you call our Create user API. Alternatively, just for the sake of testing purposes, you can add this from the CometChat Dashboard as well.- Login to CometChat.
- Select your app and go to the “Users” section.
- Click on the Edit option available under the three dots for the user under consideration.
- Click on the Edit button on the Details section.
- Paste the below JSON in the Metadata input box and hit Save.
@private key present and should have the value email specified for the user. The format for the private metadata must be as follows:
- JSON
2. Read Receipts
Be sure to implement read receipts so that your users receive email notifications for unread messages only.Integration using Webhook
This method of integration allows you to choose your Email API vendor and send Email notifications as per your needs.1. Create your webhook
Build your backend that integrates with the Email API vendor of your choice. Expose a URL that accepts an HTTP POST request.This URL will be the “Webhook URL” to which the extension will send the following details:- Body of the POST request
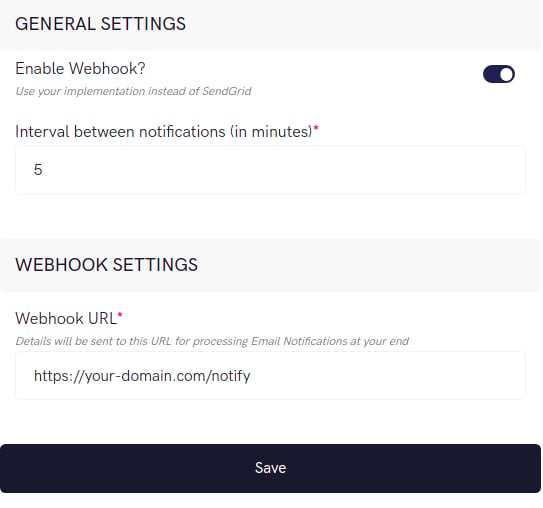
2. Extension settings
- Login to CometChat and select your app.
- Go to the Extensions section and enable the Email Notification extension.
- Open the Settings for this extension where you can fill in the below details.
- Save your settings.
Email repliesIf you wish to use the Email replies extension, you need use Integration using SendGrid.
Integration using SendGrid
We have partnered with SendGrid for sending Email Notifications and hence you need to set up an account on SendGrid before you start using the extension.1. Get your SendGrid API Key
- Log in to your SendGrid account.
- In the left navigation pane, go to Settings -> API Keys.
- If you don’t have an API Key yet, click on Create API Key. Give a name to your API Key and select Full Access to get started.
2. Add Email template
- In the left navigation pane, go to Email API -> Dynamic Templates.
- Click on “Create a Dynamic Template” and give a name to your template.
- In the Template listing, expand your template and click on “Add Version”.
- Under the “Your Email Designs” tab, select Blank Template.
- As we have the following HTML template ready for you, select the “Code Editor” option.
- Paste the code for the email template. You should be able to see the Preview in the Right pane.
- Click on Settings on the Left to expand the Settings drawer.
- Enter the Version name and Subject for your email and hit “Save”.
- You have now successfully created a Template with a version. From the Dynamic Templates listing page, expand your Template and make note of your Template ID.
- The data sent from the extension to SendGrid for using in the template are as follows:
- Replace “https://www.YOURSITE.com” with your website’s URL in the below template.
- The template filters and displays the TEXT messages in the email. Feel free to modify the template to include MEDIA messages as well.
- HTML
3. Add Unsubscribe Group
An unsubscribe group will allow your users to unsubscribe to only chat email notifications and will allow you to continue to send other emails to that user via SendGrid.- In the left pane, go to Suppressions -> Unsubscribe Groups
- Click on “Create New Group” and give it a name and proper description.
- Save your new group and note down the Group ID.
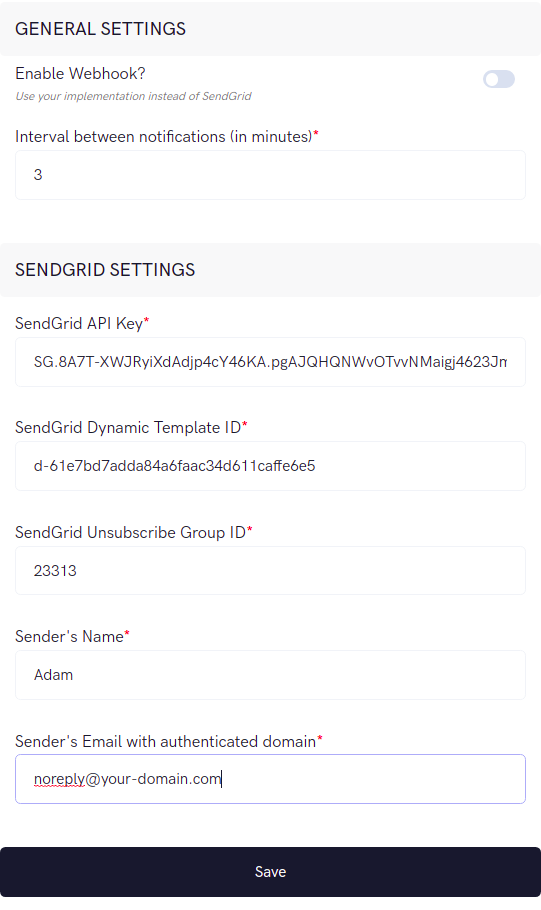
4. Extension settings
- Login to CometChat and select your app.
- Go to the Extensions section and enable the Email Notification extension.
- Open the Settings for this extension where you can fill in the below details.
- Save your settings.
Domain AuthenticationThe domain used in Sender’s Email needs to be Authenticated. Refer to SendGrid’s documentation on Domain Authentication for more details.
Receive Email Notifications
Send a message to an offline user and watch them receive an email automagically!