

Start your first conversation
CometChat UI Kit for React Native is a collection of prebuilt UI components designed to simplify the development of an in-app chat with all the essential messaging features. Our UI Kit offers light and dark themes, various fonts, colors, and additional customization options. CometChat UI Kit supports both one-to-one and group conversations. Follow the guide below to initiate conversations from scratch using CometChat React Native UI Kit.
Prerequisites
Before installing UI Kit for React Native, you need to create a CometChat application on the CometChat Dashboard, which comprises everything required in a chat service including users, groups, calls & messages. You will need theApp ID , AuthKey, Region of your CometChat application when initialising the SDK.
i. Register on CometChat
- To install UI Kit for React Native, you need to first register on CometChat Dashboard. Click here to sign up.
- Create a new app
- Head over to the QuickStart or API & Auth Keys section and note the App ID, Auth Key, and Region.
Getting Started
You can quickly start building a modern messaging experience into your app by installing the new UI Kit, an add-on for the CometChat React Native SDK.Step 1
Create a project
To get started, openterminal and create a new project using below command.
- Bash
Step 2
Add Dependency
You can install UI Kit for React Native through using below command.- Bash
Other Dependencies
- Bash
Add Permissions for android
OpenAndroidManifest.xml file from android/app/src/main location and add below permissions
- XML
Please make sure Android SDK path is set in the
ANDROID_HOME environment variable or in local.properties via the field sdk.dir.Install @cometchat/calls-sdk-react-native Package (Optional)
To enable calling functionality in your application, you need to install the Calling SDK separately within your project.-
You can install
@cometchat/calls-sdk-react-nativeCalling SDK for React Native using below command.- Bash
-
Install dependancies required for call SDK to work
- Bash
-
Add permissions
Android:
iOS:
- XML
- XML
Step 3
Initialise CometChatUIKit
To integrate and run CometChat UI Kit in your app, you need to initialize it beforehand. The Init method initializes the settings required for CometChat. Please ensure to call this method before invoking any other methods from CometChat UI Kit or CometChat SDK.The Auth Key is an optional property of the
UIKitSettings Class. It is intended for use primarily during proof-of-concept (POC) development or in the early stages of application development. You can use the Auth Token method to log in securely.- TypeScript
Login User
For login, you require a UID. You can create your own users on the CometChat Dashboard or via API. We have pre-generated test users: cometchat-uid-1, cometchat-uid-2, cometchat-uid-3, cometchat-uid-4, cometchat-uid-5. The Login method returns the User object containing all the information of the logged-in user.This straightforward authentication method is ideal for proof-of-concept (POC) development or during the early stages of application development. For production environments, however, we strongly recommend using an Auth Token instead of an Auth Key to ensure enhanced security.
- TypeScript
Step 5
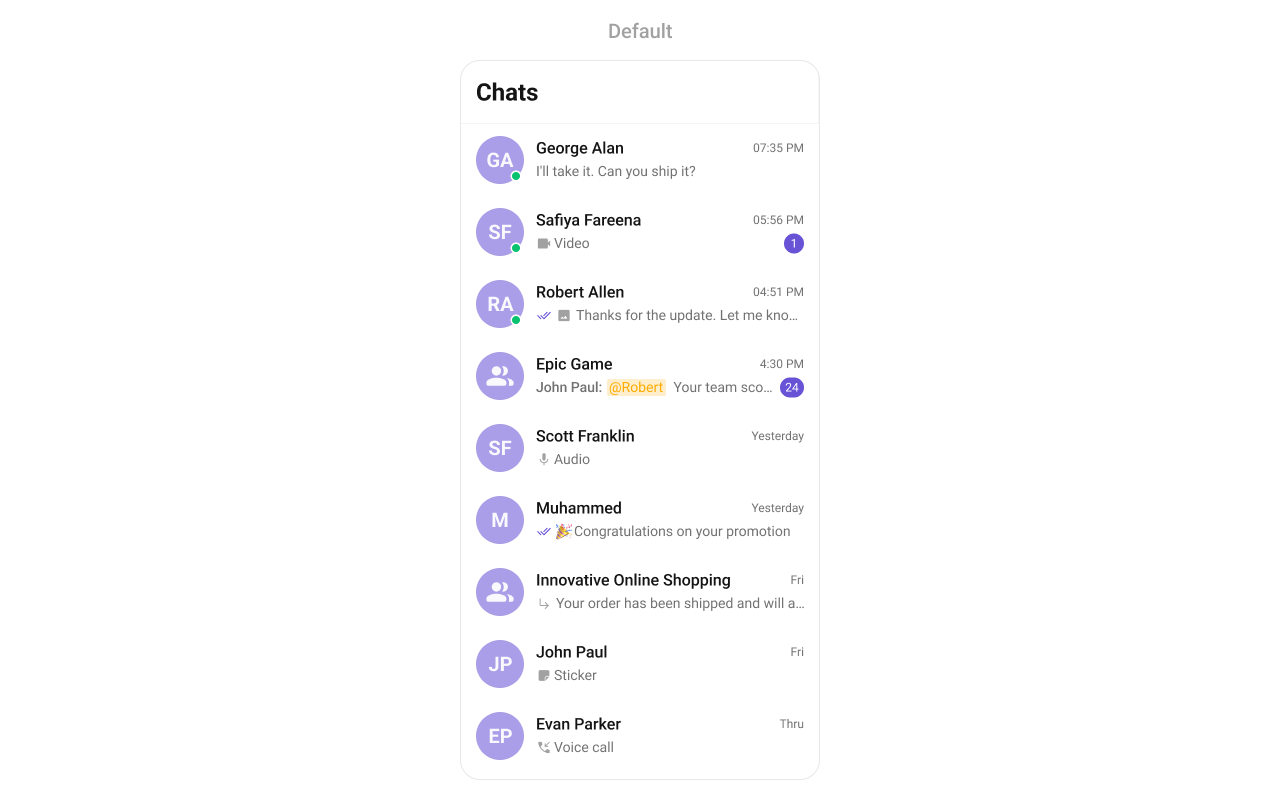
Render Conversations with Messages
Loading the Conversations Component
- App.tsx
Loading the Messages Component
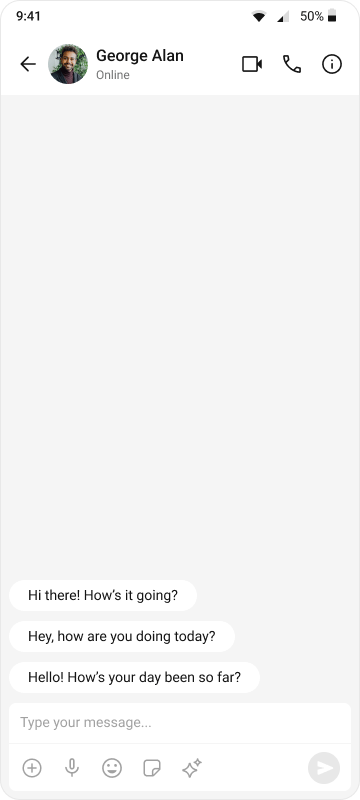
- The Messages component allows users to view and send messages in both one-on-one and group conversations.
- Messages.tsx