

I want to checkout the sample app
React Native Push notifications sample appView on Github
Firebase Project Setup
Visit Firebase and login/signup using your Gmail ID.Step 1: Create a new Firebase Project
Head over to the Firebase Console to create a new project.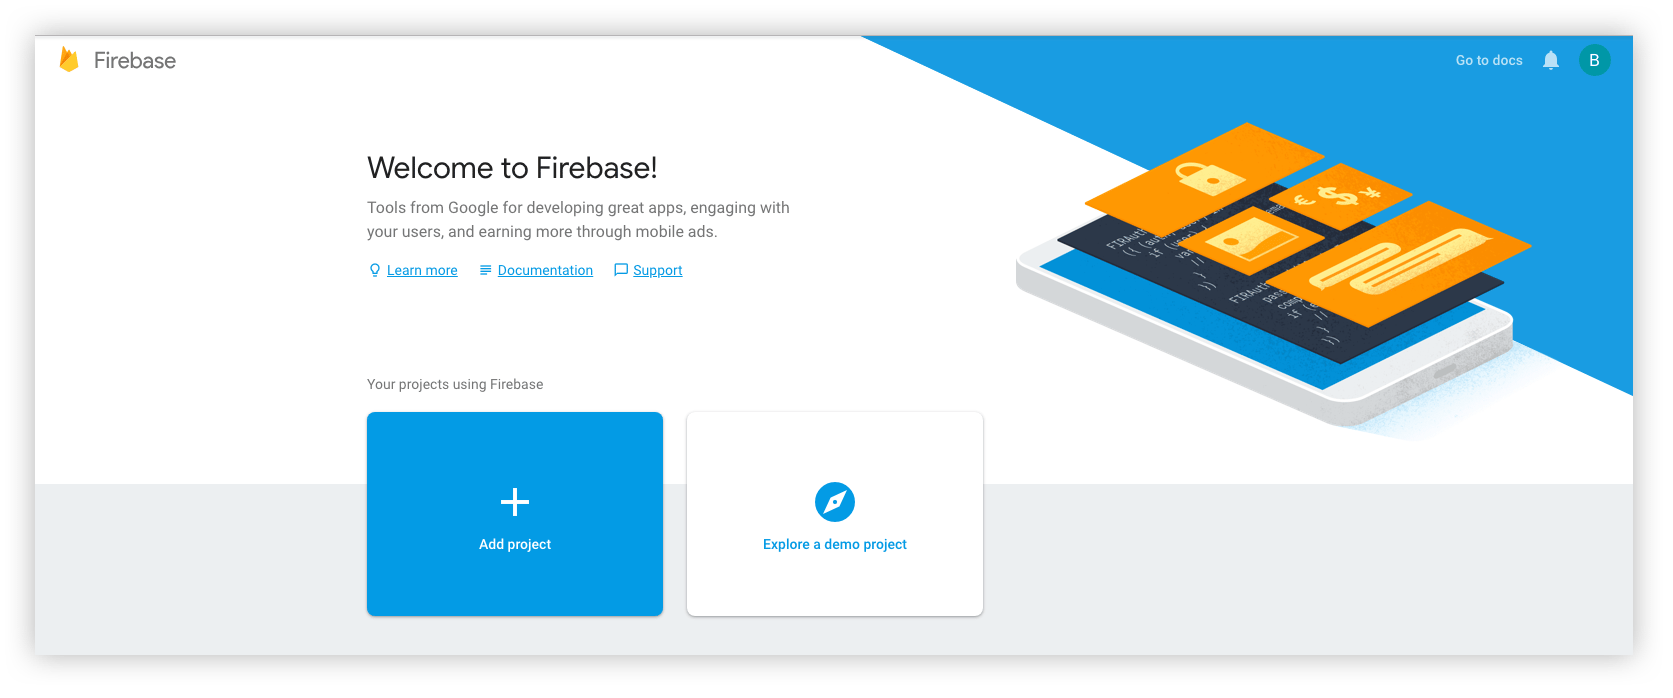
- You give a name to your project
- Add Google Analytics to your project (Optional)
- Configure Google Analytics account (Optional)
Step 2: Add Firebase to your App
React native setup will require 2 files for Android and iOS:- For Android, you need to download the google-services.json file from the Firebase console.
- For iOS, you need to download the GoogleService-Info.plist file from the Firebase console.
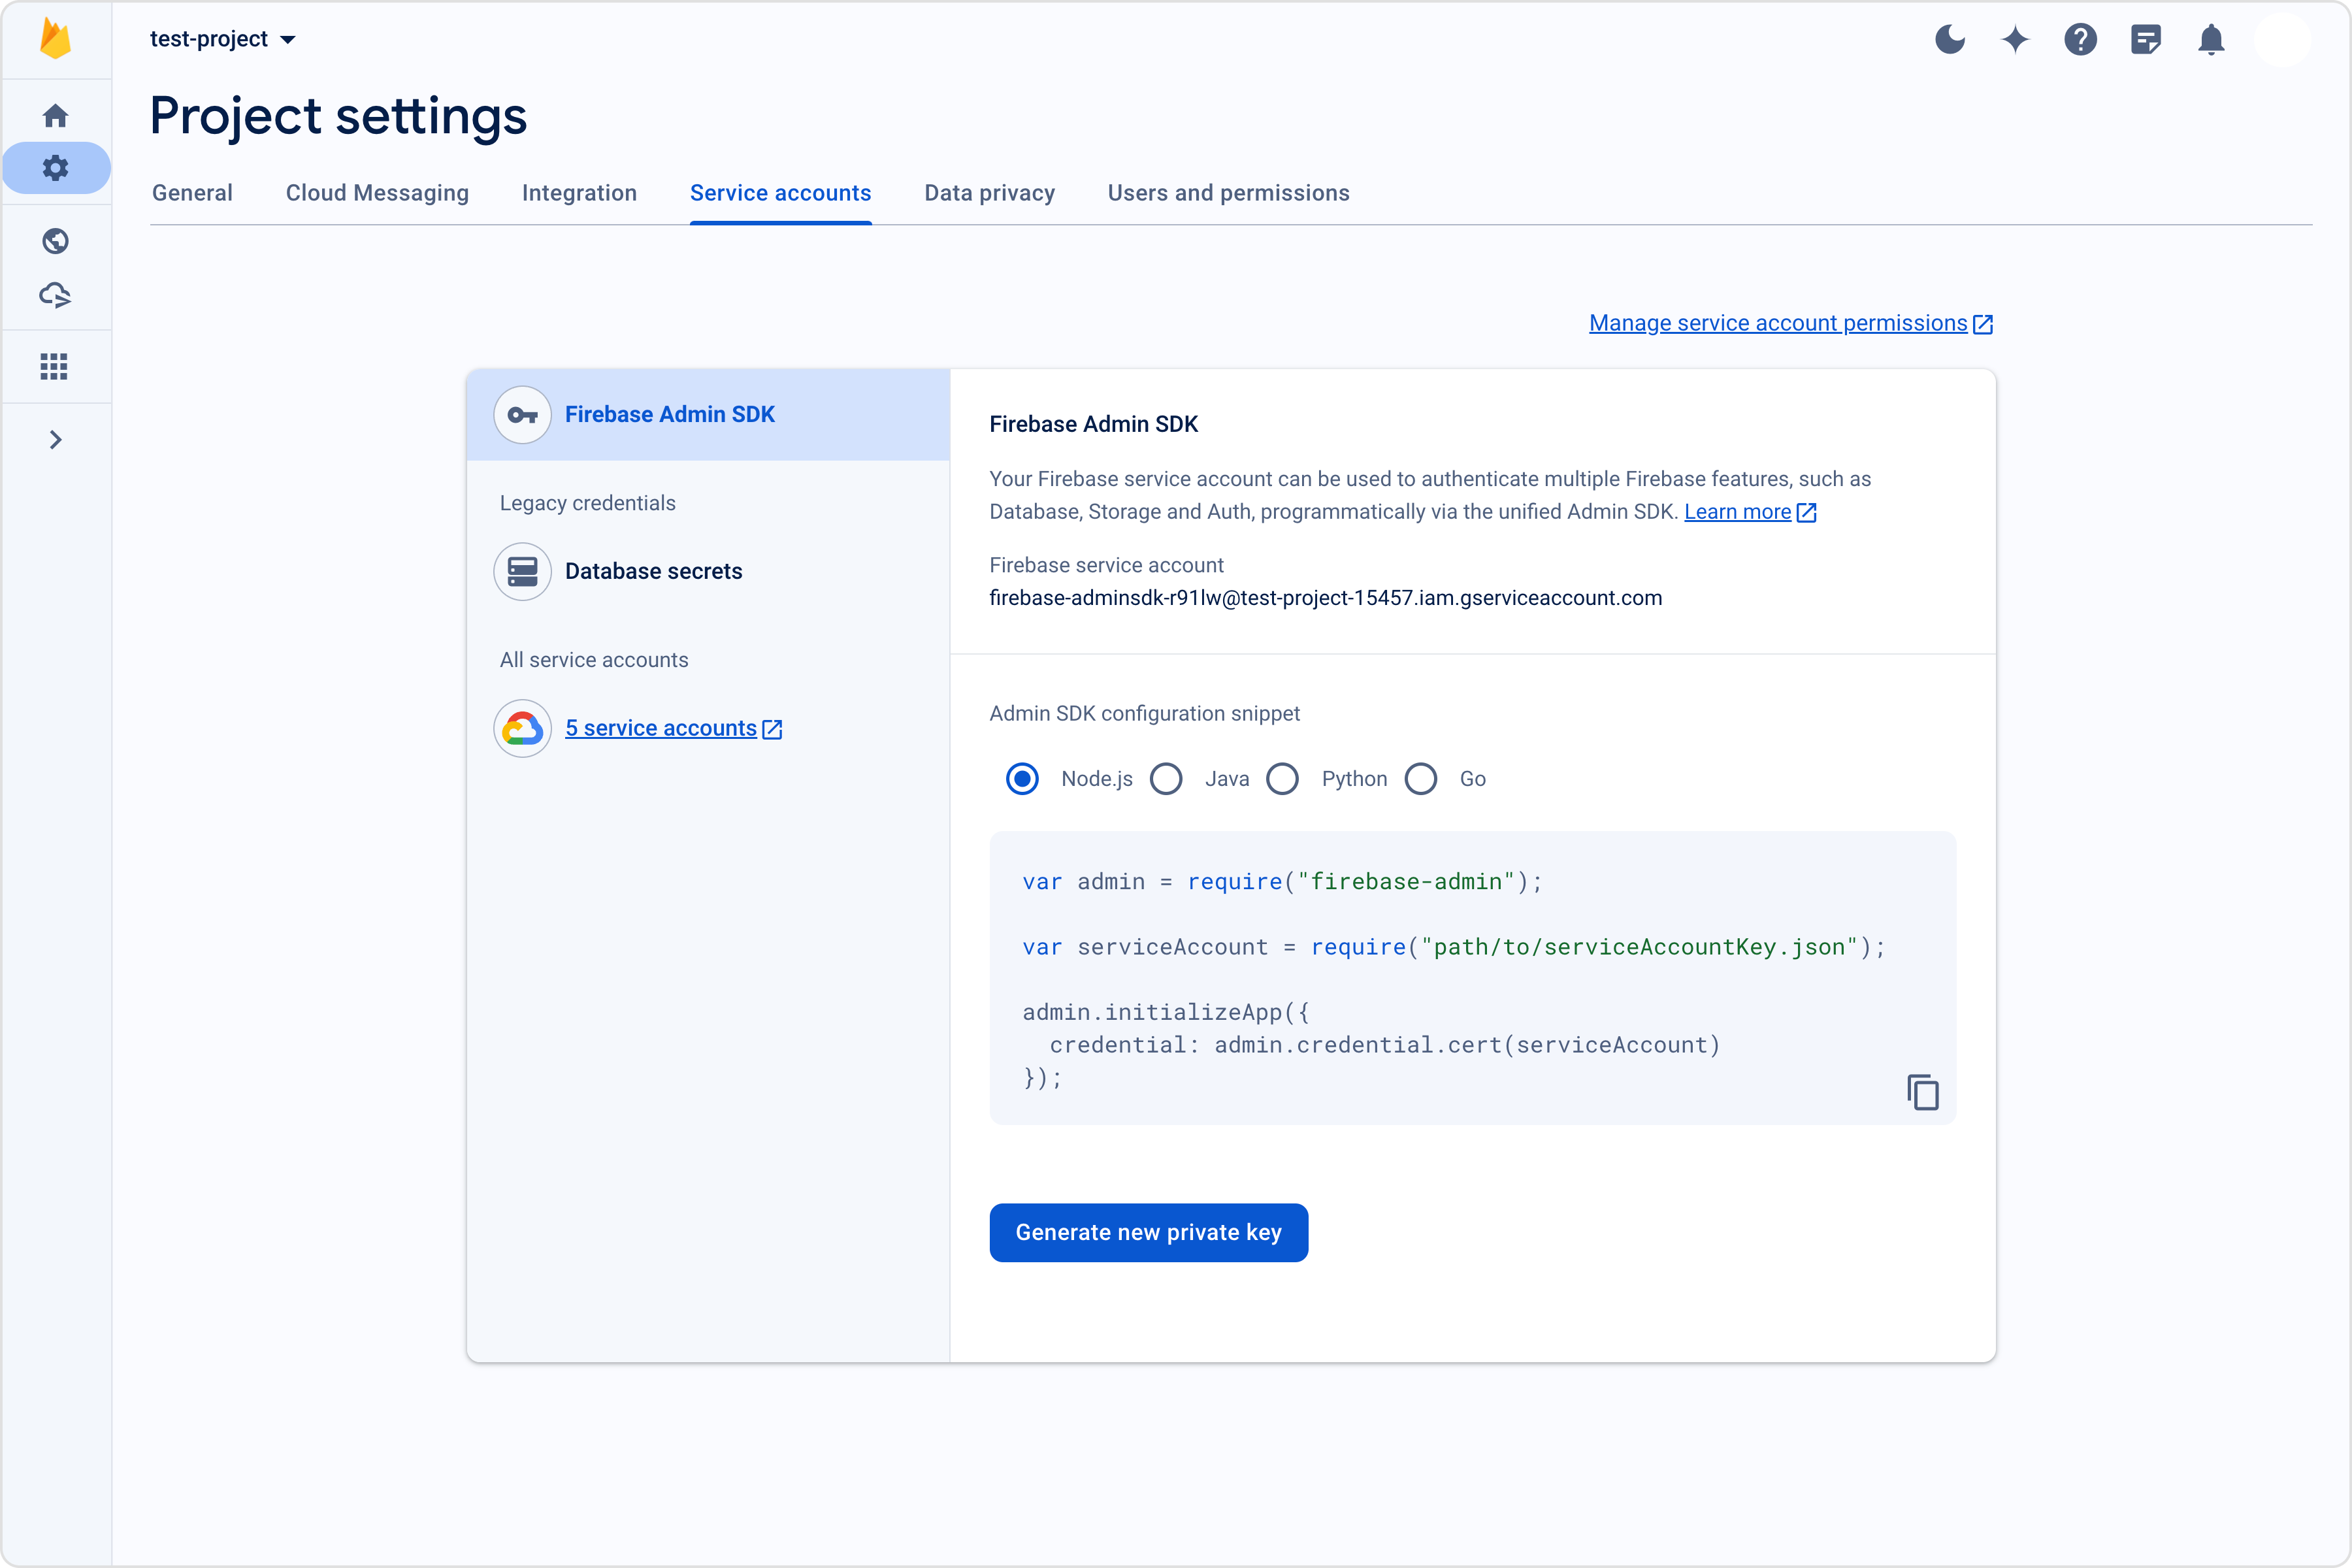
Step 3: Download the service account file
Extension settings
Step 1: Enable the extension
- Login to CometChat and select your app.
- Go to the Extensions section and Enable the Push Notifications extension.
- Open up the settings and save the following settings.
Step 2: Save your settings
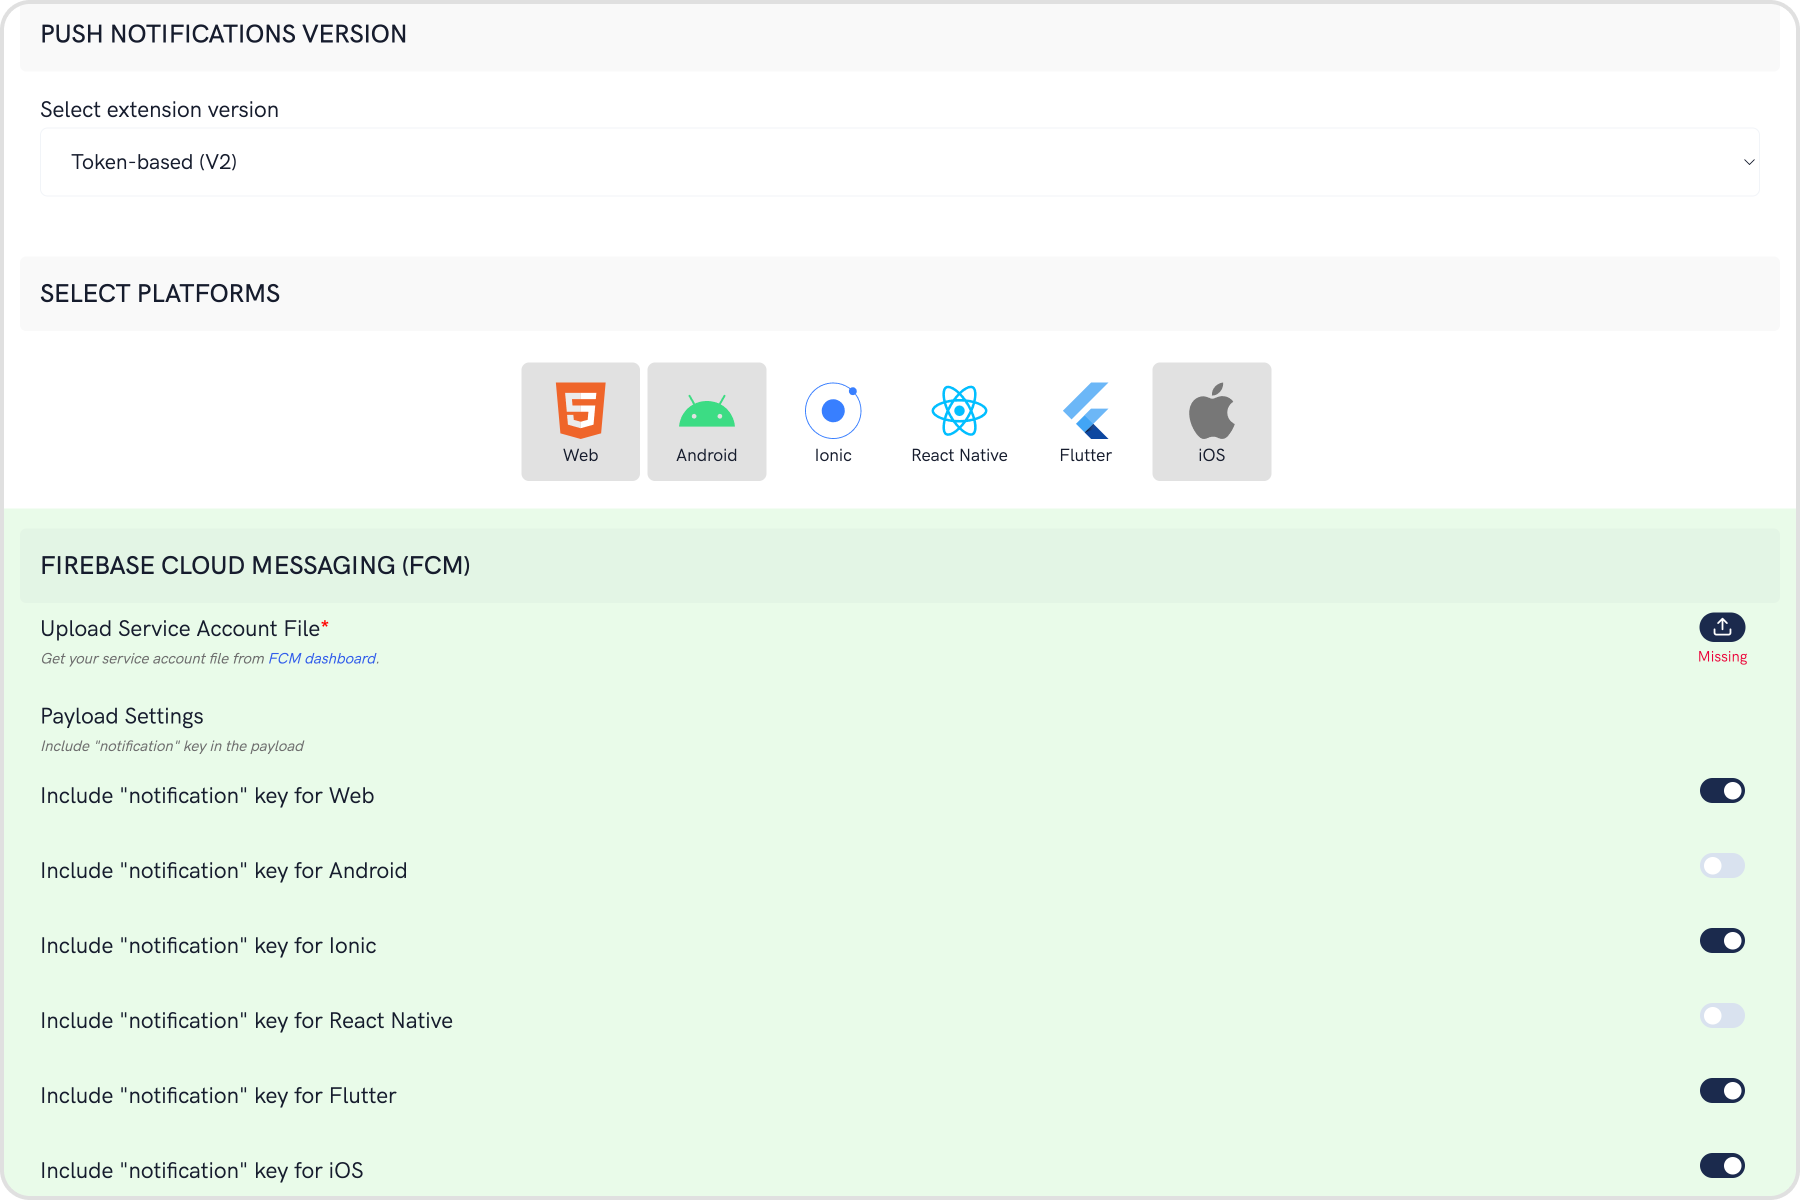
On the Settings page you need to enter the following:- Set extension version
- If you are setting it for the first time, Select
V2to start using the token-based version of the Push Notification extension. - If you already have an app using
V1and want to migrate your app to useV2, then SelectV1 & V2option. This ensures that the users viewing the older version of your app also receive Push Notifications. - Eventually, when all your users are on the latest version of your app, you can change this option to
V2, thus turning offV1(Topic-based) Push Notifications completely.
- Select the platforms that you want to support
- Select from Web, Android, Ionic, React Native, Flutter & iOS.
- Notification payload settings
- You can control if the notification key should be in the Payload or not. Learn more about the FCM Messages here.
- Push payload message options
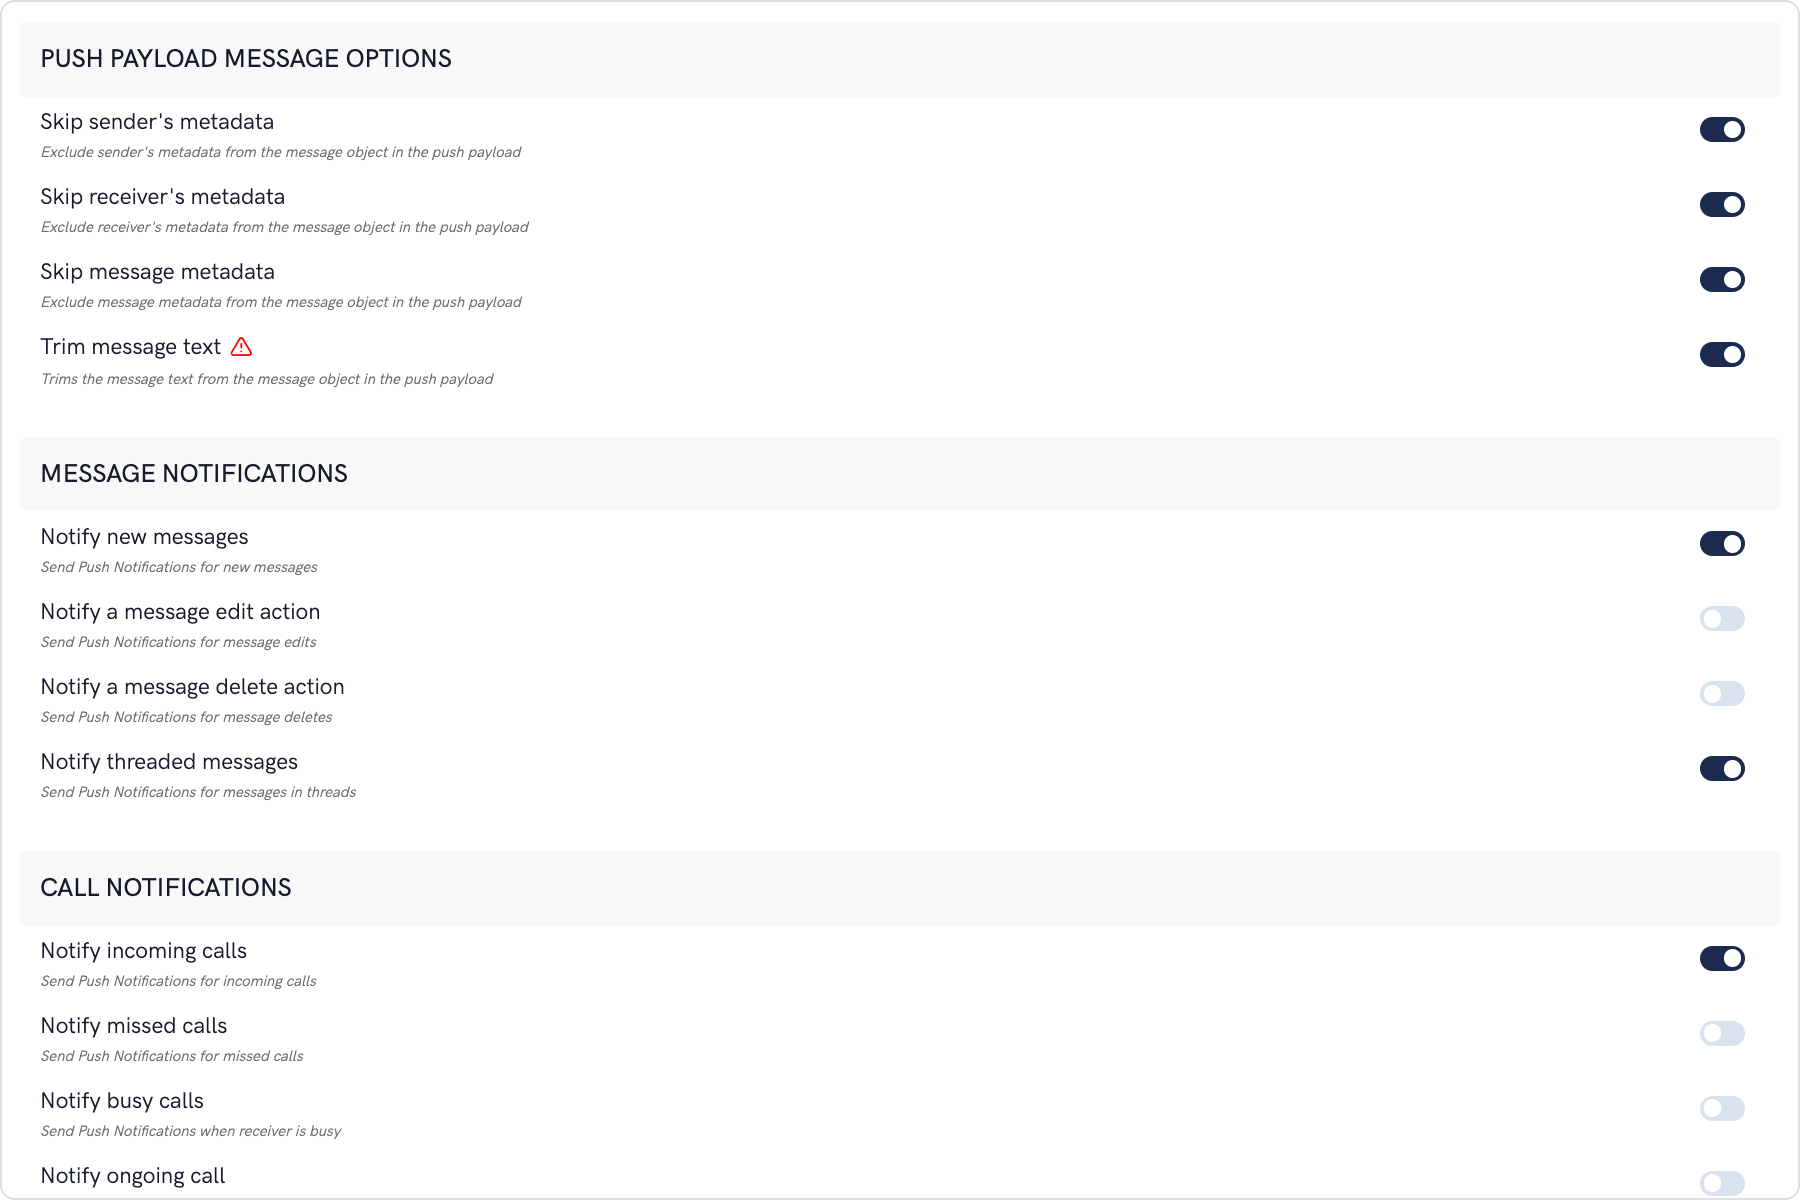
- The message metadata includes the outputs of the Thumbnail Generation, Image Moderation, and Smart Replies extensions. You may want to retain this metadata if you need to customize the notification displayed to the end user based on these outputs.
- Notification Triggers

-
Select the triggers for sending Push Notifications. These triggers can be classified into 3 main categories:
- Message Notifications
- Call Notifications
- Group Notifications
- These are pretty self-explanatory and you can toggle them as per your requirement.
App Setup
Step 1: Initial plugin setup
- For React Native, there are numerous plugins available via NPM which can be used to set up push notifications for your apps. react-native-firebase and react-native-notifications are just the two out of many available.
- To setup Push Notification, you need to follow the steps mentioned in the Plugin’s Documentation.
- Two separate apps created on the Firebase console. (For Android and iOS).
- Plugin setup completed as per the respective documentation and our reference.
Step 2: Register FCM Token
- This step assumes that you already have a React Native app setup with CometChat installed. Make sure that the CometChat object is initialized and user has been logged in.
- On the success callback of user login, you can fetch the FCM Token and register it with the extension as shown below:
- JavaScript
- Registration also needs to happen in case of token refresh as shown below:
- JavaScript
Step 3: Receive Notifications
- JavaScript
We send Data Notifications and you need to handle displaying notifications at your end. For eg: Using Notifee
Step 4: Stop receiving Notifications
- Simply logout the CometChat user and you will stop receiving notifications.
- As a good practice, you can also delete the FCM Token by calling
deleteTokenon the messaging object.
- JavaScript
Advanced
Handle Custom Messages
To receive notification ofCustomMessage, you need to set metadata while sending the CustomMessage.
- JavaScript
Converting push notification payload to message object
CometChat SDK provides a methodCometChat.CometChatHelper.processMessage() to convert the message JSON to the corresponding object of TextMessage, MediaMessage,CustomMessage, Action or Call.
- JavaScript
Type of Attachment can be of the following the type
1.
2.
3.
4.
1.
CometChatConstants.MESSAGE_TYPE_IMAGE2.
CometChatConstants.MESSAGE_TYPE_VIDEO3.
CometChatConstants.MESSAGE_TYPE_AUDIO4.
CometChatConstants.MESSAGE_TYPE_FILE- Text message
- Media message
Integrating ConnectionService and CallKit Using CometChat Push Notification
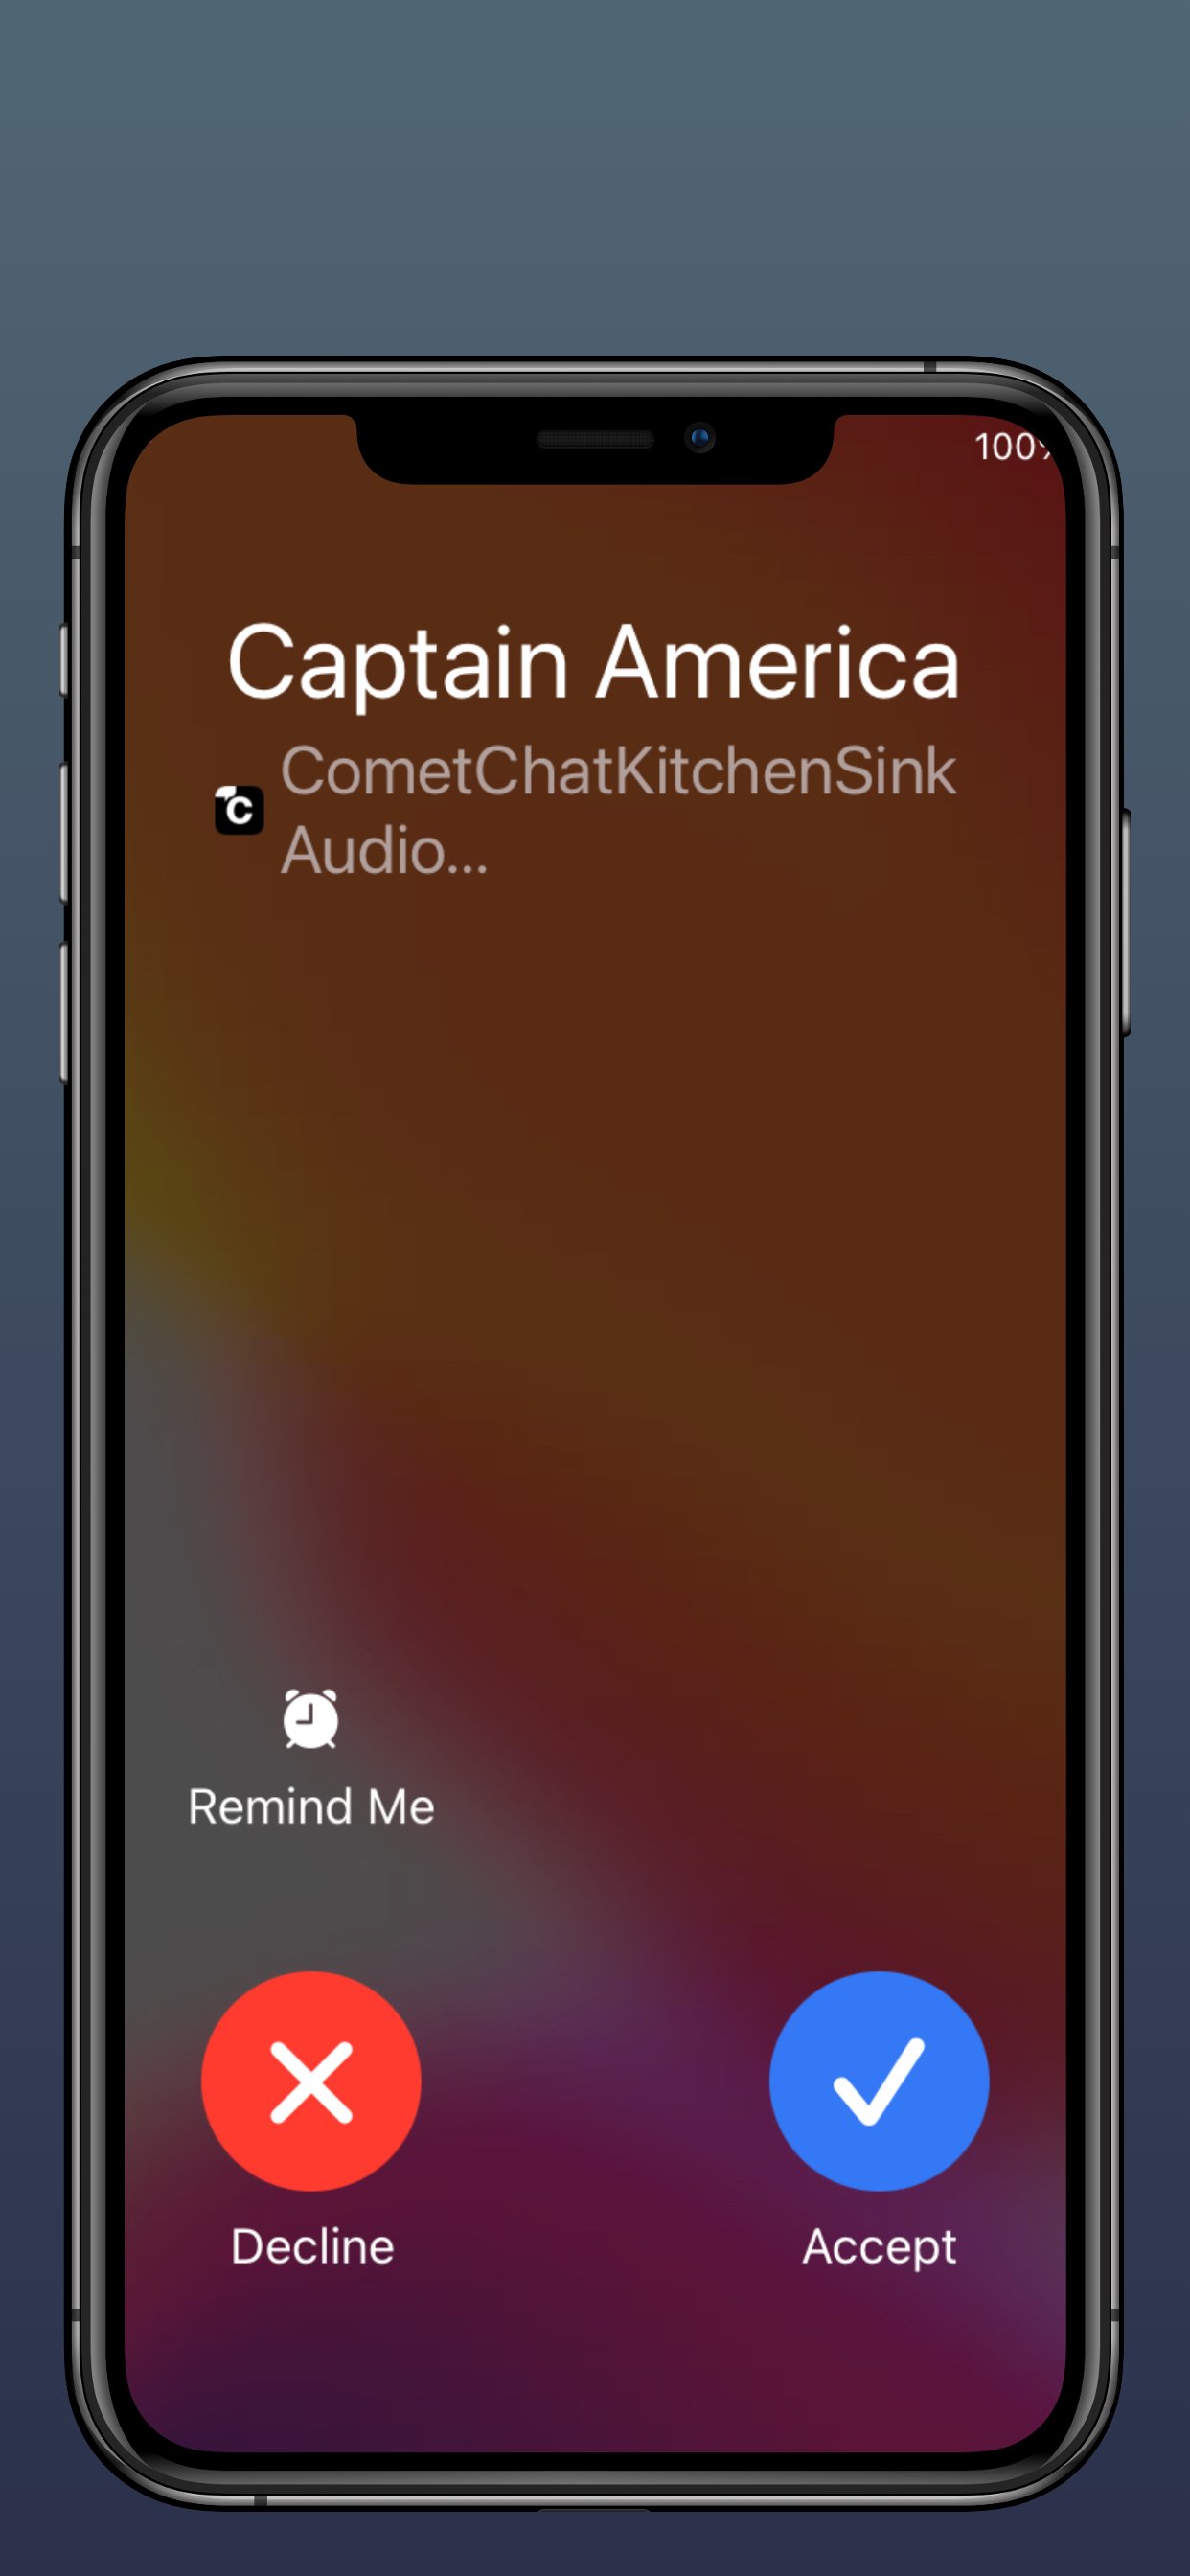
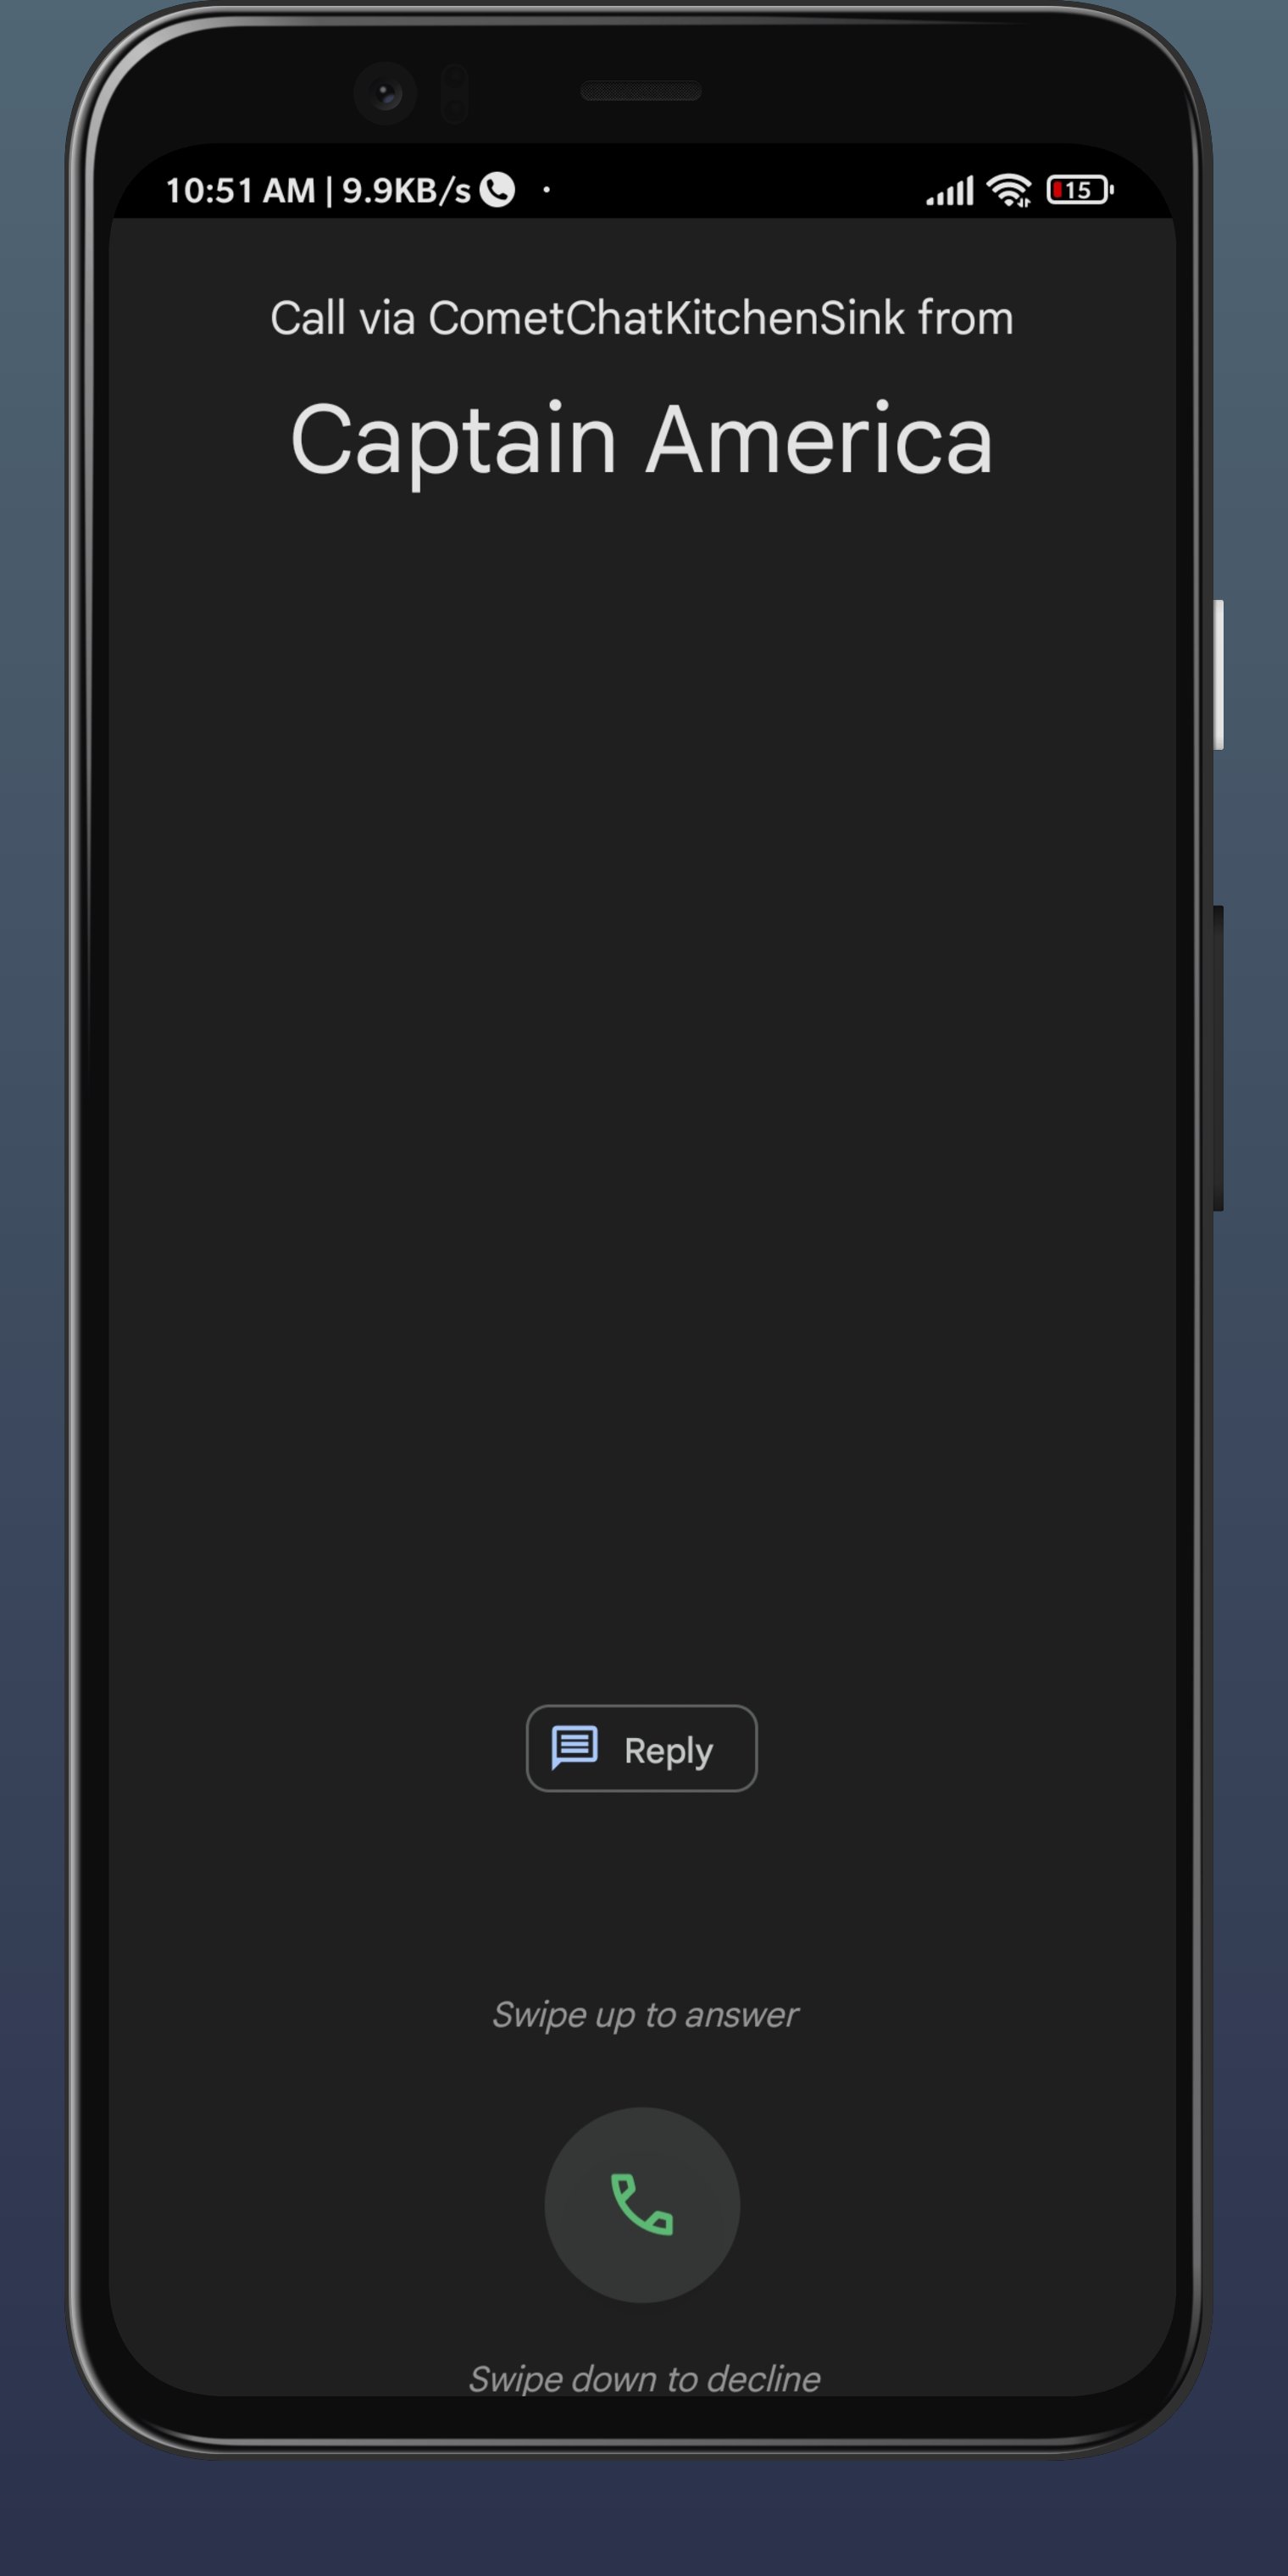
Setup push notification
- Android
- iOS
Step 1: Create a Certificate Signing Request
To obtain a signing certificate required to sign apps for installation on iOS devices, you should first create a certificate signing request (CSR) file through Keychain Access on your Mac.- Open the Keychain Access from the utility folder, go to Keychain Access > Certificate Assistant > Request a Certificate From a Certificate Authority, and then click.
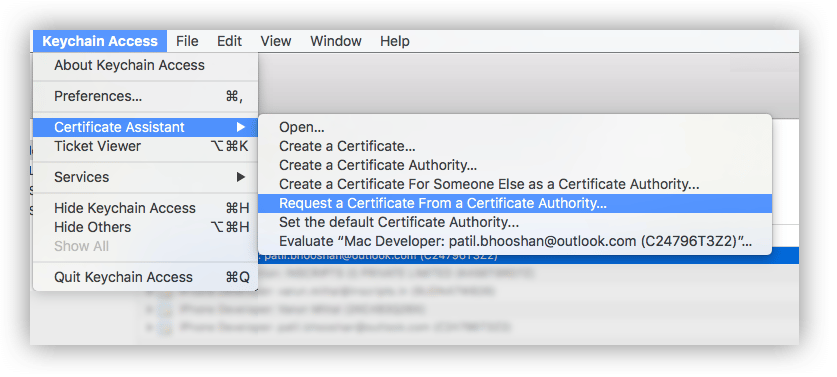
- The Certificate Information dialog box appears. Enter the email address that you use in your Apple Developer account, and enter a common name for your private key. Don’t enter CA email address, choose Saved to disk, and then click the Continue button. <img align=“center” src=”./images/step1.2.png”> <br></br>
- Specify the name of your CSR to save and choose the location to save the file on your local disk. Then your CSR file is created, which contains a public/private key pair.
Step 2: Create an SSL certificate
- Sign in to your account at the Apple Developer Member Center.
- Go to Certificates, Identifiers & Profiles.
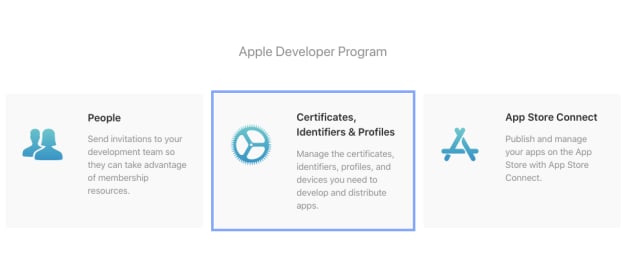
- Create new Certificate by clicking on the + icon.
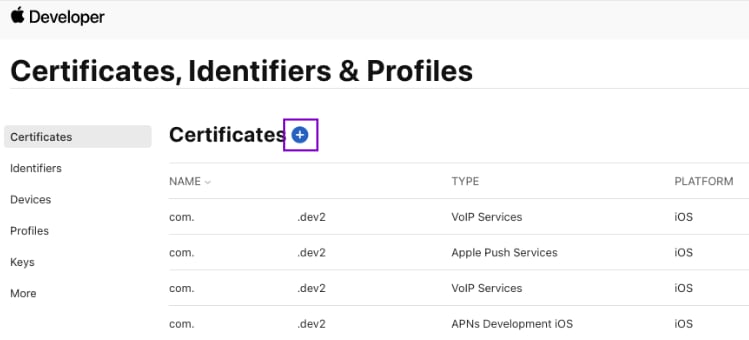
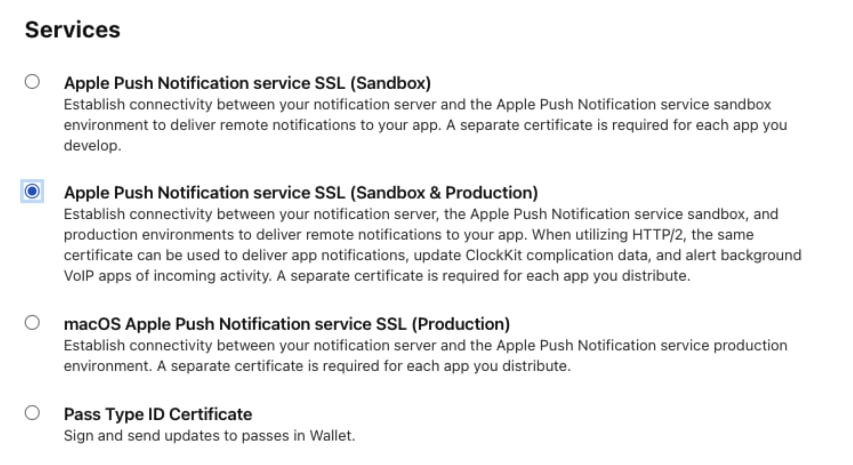
- Under Services, select - Apple Push Notification services SSL (Sandbox & Production)
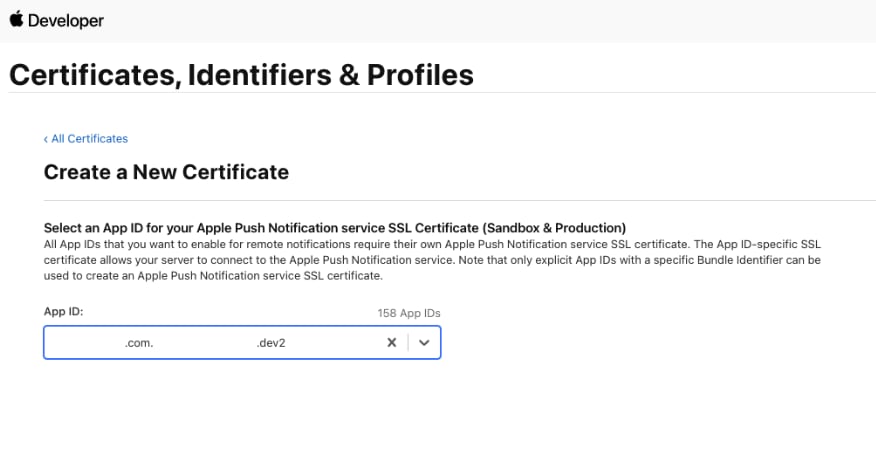
- Select your App ID from the dropdown.
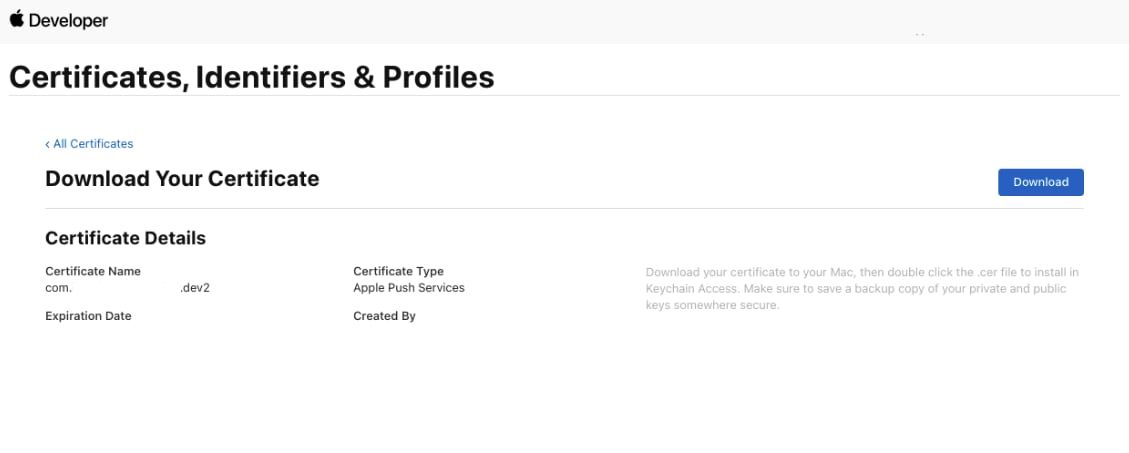
- Upload CSR file., upload the CSR file you created through the Choose File button. To complete the process, choose Continue. When the certificate is ready, choose Download to save it to your Mac.
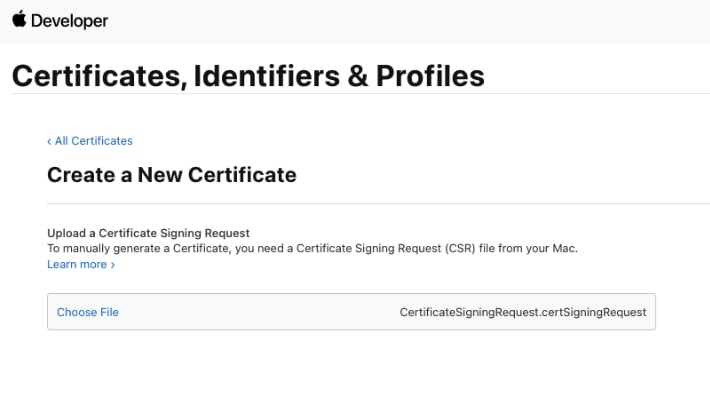
Step 3: Export and update .p8 certificate
- To generate a .p8 key file, go to Apple developer account page, then select Certificates, IDs & Profiles.
- Select Keys and click on the ”+” button to add a new key.
- In the new key page, type in your key name and check the Apple Push Notification service (APNs) box, then click “Continue” and click “Register”.
- Then proceed to download the key file by clicking Download.
- Make note of the
Key ID,Team IDand yourBundle IDfor saving in the Extension’s settings.
- Type a name for the .p12 file and save it to your Mac.
- Browse to the location where you saved your key, select it, and click Open. Add the key ID for the key (available in Certificates, Identifiers & Profiles in the Apple Developer Member Center) and export it.
- DO NOT provide an export password when prompted.
- The .p12 file will be required in the next step for uploading in the CometChat Dashboard.
Extension settings
Step 1: Enable the extension
- Login to CometChat and select your app.
- Go to the Extensions section and Enable the Push Notifications extension.
- Open the settings for this extension and save the following.
Step 2: Save your settings
On the Settings page you need to enter the following: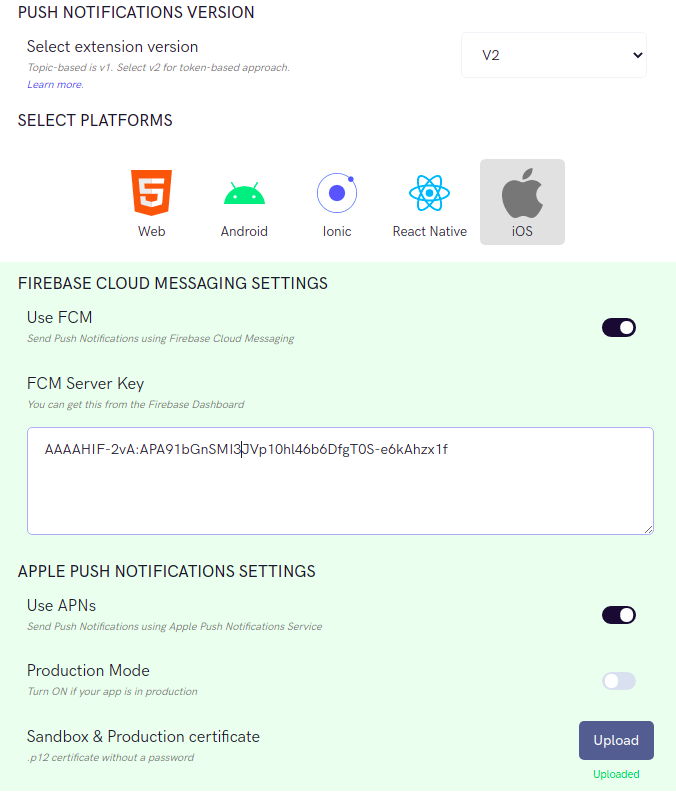
- Set extension version The extension version has to be set to ‘V2’ or ‘V1 & V2’ in order to use APNs as the provider.
- Select Platforms You can select the platforms on which you wish to receive Push Notifications.
- Firebase Cloud Messaging Settings This includes the FCM Server key that you can fetch from the Firebase Dashboard.
- APNs Settings You can turn off the Production mode when you create a development build of your application. Upload the .p12 certificate exported in the previous step.
- Push Notifications Title This is usually the name of your app.
-
Notification Triggers
Select the triggers for sending Push Notifications. These triggers can be classified into 3 main categories:
- Message Notifications
- Call Notifications
- Group Notifications
Installation
We need to add two packages for this- React-native-CallKeep
- Bash
- React Native VoIP Push Notification
- Bash
App Setup
First you need to Setup CallKeep at the start of the app in Index.js- JavaScript
- JavaScript
Android
In android we are going to use Firebase push notification to display Call notification So basically when ever we receive a push notification for call we display call notification. we need to add a listener to listen to notification when the app is background or foreground state.- JavaScript
iOS
In iOS we use APNs push and voip push notification to display push notification and display call CallKit for calls. The notification are handled in Native iOS You need to add the code in AppDelegate.m file to display CallKit- Objective C